
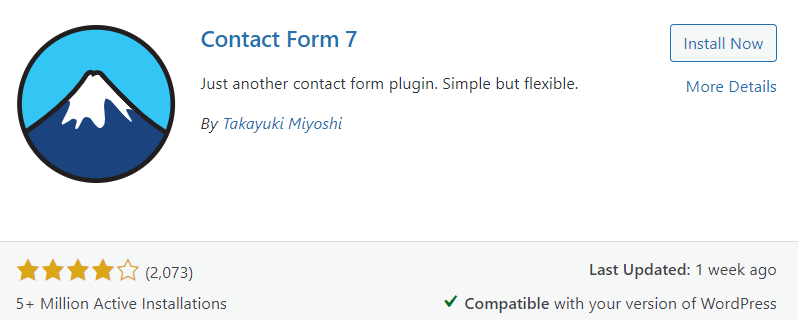
What is Contact Form 7?
Contact Form 7 is a free WordPress plugin that provides a way to create and manage variety of contact forms for your website. It is one of the most popular form plugin for WordPress. This plugin allows users to easily customize and generate contact forms using simple markup language.

Features of Contact Form 7:
- Customizable Form Fields
- Spam Prevention
- Email Notifications
- Flexible Markup
- File Uploads
- Multiple Forms
Pros and Cons of Contact Form 7:
Pros |
Cons |
| It includes built in support for CAPTCHA and Akismet spam filtering. | Interface is not simple. It might take sometime for the new user to understand. |
| It is free and offers all features without any premium membership. | Preview options are not available.
|
| Provides wide range of customization options | Limited templates to use. |
| Shortcode is compatible with any theme builder. | Can cause bugs or even freeze during form submission due to caching problems. |
How to Install WordPress Contact Form 7
Step1: Go to your WordPress Dashboard select plugins and add new plugin.
Step2: Search for Contact Form 7.
Step3: Install the plugin and activate it.
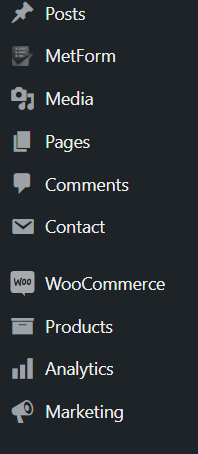
Step4: Once the plugin is installed, on your dashboard you can see the Contact menu.
Overview of Contact Form 7:
Select Contact > Contact Forms in your WordPress sidebar, you can view all your contact forms that you have created.
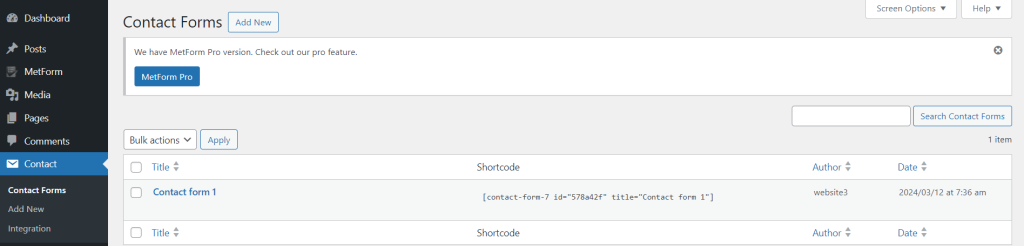
When you install Contact Form 7, you will get a default sample form, so the Contact form 1 is a sample form. Click on Contact form 1 to know more about the form settings.
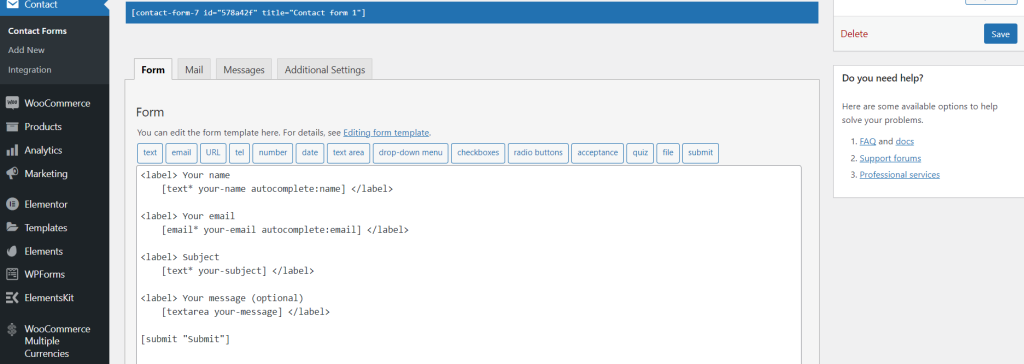
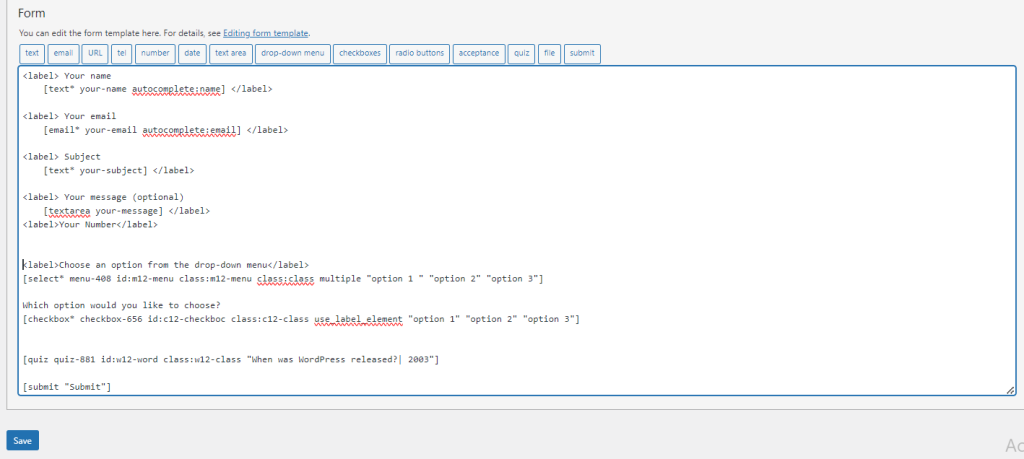
When you click on Edit in Contact form 1 page it has four sections
Form: It has a built-in template. You can customize or edit your template as per your needs.
Mail: You can customize the email template and specify the Email address, Subject, Message body, Additional headers to set up email notification after the form is submitted.
Messages: You can customize the messages as per your needs to display after user submits the contact form, which includes success messages and error messages.
Additional Settings: Allows you to add additional configurations to your form. You can enable additional features using QUIZ feature or integrate CAPTCHA for security.
Step1: In your WordPress dashboard go to Contact and select Add New.
Step 2: Name your new contact form and click on save.

Brief description of form tags in Contact Form 7:
Text: Generates a single-line plain text input field.
Email: Creates a text input field for email address.
URL fields: Creates a input field for websites URLs.
Tel: Input field for a telephone number.
Number: Creates a form tag for a number. Number fields only allow numeric digits.
Date: Creates a form tag for date input field.
TextArea: It allows for multiple lines of text which is suitable for longer messages or comments.
Drop-down Menu: Creates a drop-down menu for users.
Checkboxes: It provides multiple selection for the users.
Radio Buttons: It provides single-choice selection for users.
Acceptance: Generates an acceptance checkbox which is used for agreeing to terms and conditions, where the users must click on checkbox to proceed further.
Quiz: Generates a question-answer pair where the users answers the quiz. It is useful for spam prevention.
File: Users can attach or upload files
Submit: Creates a submit button to your form.
Using the Text Form Tag
Step1: Click on text, you can see a popup menu. You can configure the form tag’s settings.
Step2: After filling all the fields you can see a shortcode generated, you can add the shortcode anywhere in the content editor.
Step3: Click on insert tag. It will add the form tag to the contact form template.
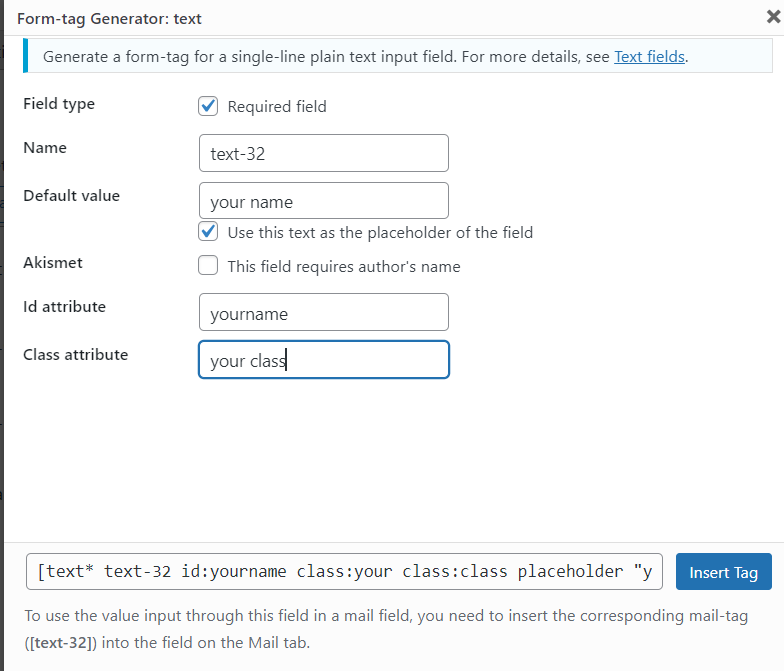
Field Type: If a field in your form is a required field you should checkmark this option.
Name: It is used to process the data. It is a unique identifier for the form field.
Default Value (Optional): You can set a default value and it will appear on your text field when the form loads.
Akismet: Akismet will determine whether a comment or submission looks like spam.
ID and Class Attributed: When dealing with CSS or JavaScript you can assign ID and class attributes to the text field for advanced customization.
Now you can customize your WordPress Contact Form 7, I will be customizing other form tags like Name, Email, Message, Checkbox, Dropdown, Submit button.
All the other form tags will be used similarly.
Step1: Go to Contact > Contact Form
Step2: Select your respective form. I will use Simplileap Contact Form.

Step3: I will be using Name, Email, Message, Subject, Checkbox, Dropdown, Quiz, Submit button form tags.
Step4: Click on insert tag. It will add the form tag to the contact form template.
Step5: After inserting the respective tags the final form text will look like this.
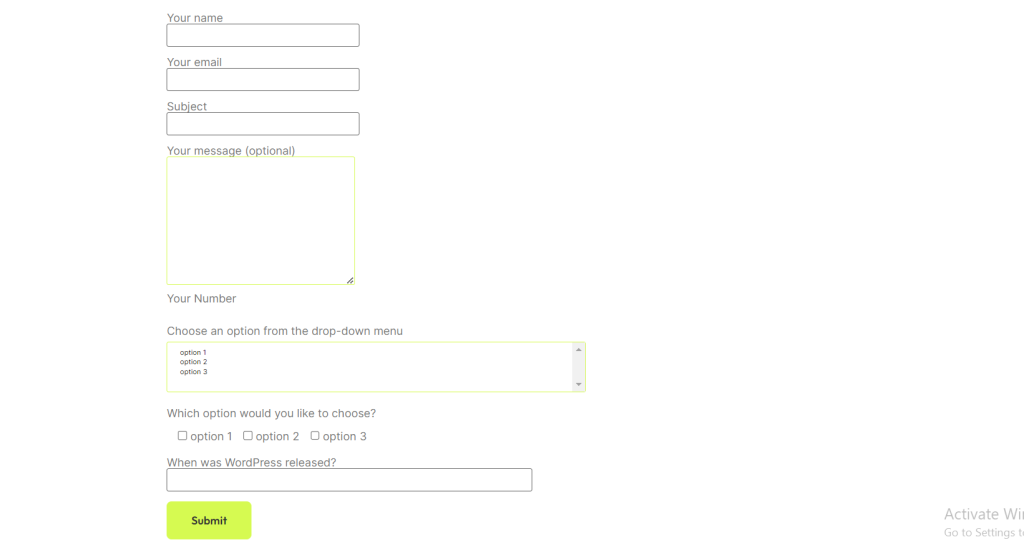
Step6: Click save and you will see a shortcode generated.

Step7: Paste the shortcode in your content editor. Update your page.

Step8: Now you should be able to see the contact form on the page where you have added the shortcode, here is the result.
Configure Mail Settings in Contact Form 7
To Field: In this field you will have to enter your email address, and when someone submits the form you will receive the data.
From field: This field denotes who the email will appear from.
Subject Field: You can edit the subject of the email message.
Additional Headers: In additional headers you can use Reply-To:[your-email], it is easier to directly reply to the email address that the user has provided.
Message Body: Contact Form 7 provides a default template that includes all the form fields. When you receive an email this will be the main content that you will receive.
After configuring all the mail settings, click save to ensure all your settings are sorted.
In conclusion, setting up the contact form 7 can enhance your websites functionality, by providing an effective way for the users to reach out to you.
By following the above steps you can effectively make use of this form to enhance communication with your website visitors and customers.
For any further queries regarding WordPress Website Development, feel free reach out to us at info@simplileap.com

Driven by a relentless desire to learn and grow, I find myself exploring the domains of technology and web development. With boundless passion I am dedicated to progressing in my career and making significant contributions to the tech sector.


str
May 7, 2024Way cool! Some extremely valid points! I
appreciate you writing this post and the rest of the website is extremely good.