
What is WooCommerce?
One of the quickest methods for setting up and maintaining WordPress-based e-commerce websites is the WooCommerce plugin. Since WooCommerce was designed specifically for WordPress, it provides a seamless interface with the content management system. It enables users to market various goods, including digital, online, and physical goods.
Anyone can use WooCommerce to transform their website into an online store with full functionality, including managing orders, products, and different payment methods that make it easy to set up and apply intricate tax regimes.
Any e-commerce business must include taxes, therefore it’s critical to make sure they are appropriately computed and levied. Using WooCommerce, online store owners can accurately and compliantly apply taxes on their sales by using WooCommerce as per the tax laws and regulations, failure to correctly implement these laws could lead to penalties and legal consequences.
WooCommerce + Taxation
Store owners can set up separate tax rates for different types of sales using WooCommerce, such as different products or different sale zones. Hence setting up tax rates for their sales becomes quite simple.
Unlike the pre-GST regime, the GST law introduces just one tax with 3 components- CSGT, SGST and IGST. When products are sold within a state also known as intra-state transactions, both CSGT and SGST will be collected, however, if the sale happens between the states it is an inter-state transaction and only IGST will be collected. Therefore, GST is known as a destination-based tax which is received by a State in which the goods are consumed but not by a state in which such goods are manufactured.
WooCommerce helps store owners calculate the tax amount being levied on each transaction effortlessly by auto-generating the taxable amounts on each transaction according to the customer’s destination.
Steps to add GST in WooCommerce
The following steps will help you set up your online store using GST effortlessly:
Step 1:
The first step to setting up your online store would be to enable the tax rates and calculations under the WooCommerce ➞ Settings ➞ General tab:

Step 2:
Once enabled, you can go to the WooCommerce ➞ Settings ➞ Tax tab to configure your taxation requirements.
WooCommerce provides multiple taxation facilities that help store owners customise how they want to implement taxes on their products. Whether the store owner would prefer to enter the product amounts where taxes have already been included, add tax classes, apply the tax amounts automatically to the cart and checkout pages, and ways to display products on the storefront inclusive or exclusive or tax amounts. All this can be done under the WooCommerce ➞ Settings ➞ Tax tab:
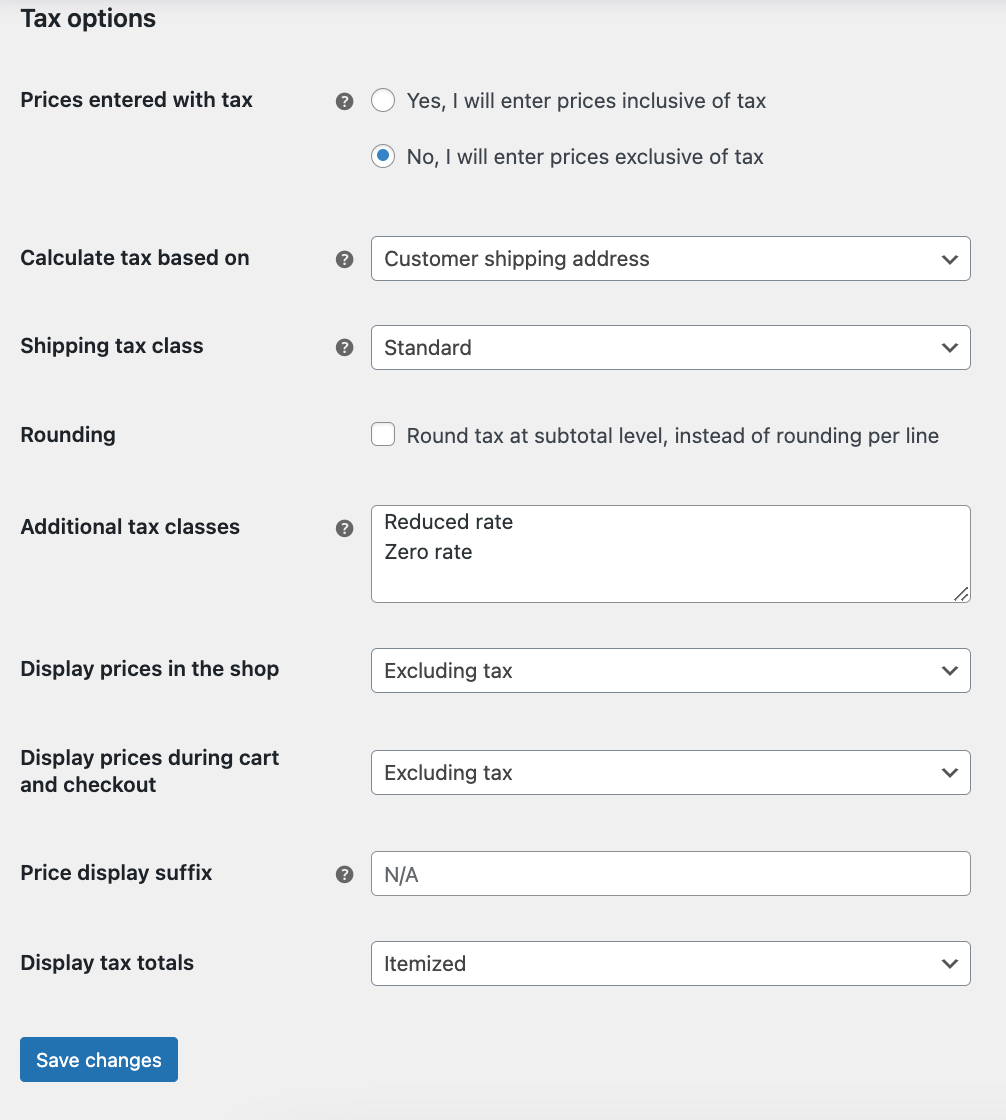
Note: When choosing an option for how the calculation for tax will be based, choosing the “Customer shipping address” option is mandatory as GST is a destination-based tax and will be calculated on the customer’s destination.
Step 3:
Once the changes have been saved, you can set up your tax rates under the “Standard Rates” tab
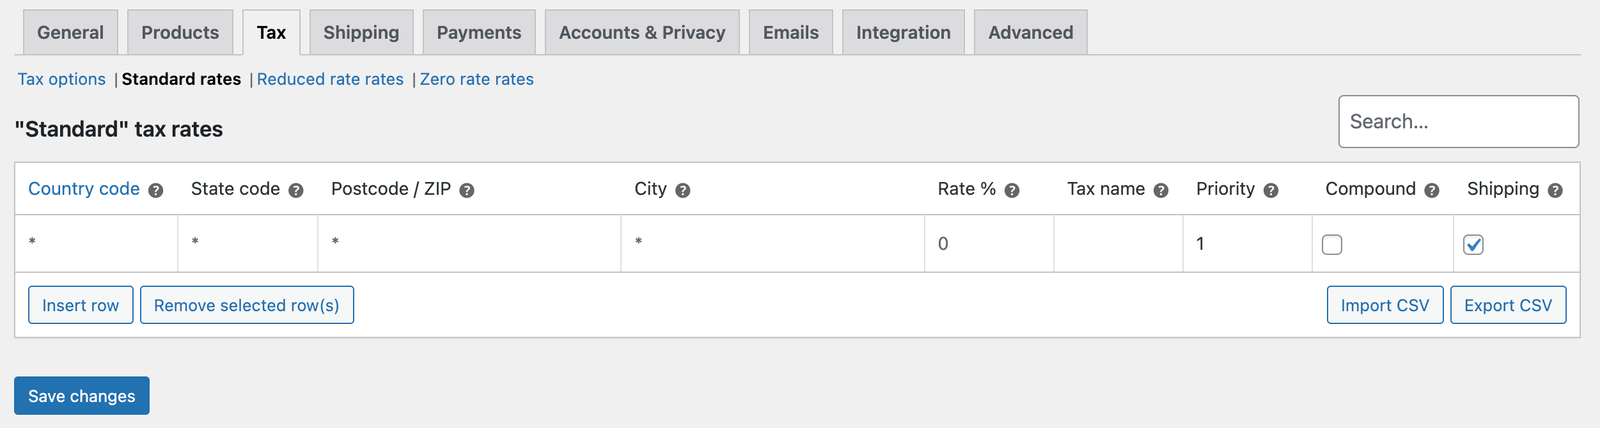
Here, you can either manually set up your desired tax rates by inserting a row and filling up the required information or import a CSV file that contains all the necessary data for tax computation.
This CSV file has been made to fit intra-state sales for Karnataka (KA), once added the calculations based on customers whose shipping addresses have been selected within the cities of Karnataka will have CSGT and SGST being implemented on their orders, while customers whose shipping addresses are outside of Karnataka will have IGST being implemented. Once imported, you can set up the GST rates applicable to your business.
CSV file – Click here to download the CSV File
Step 4:
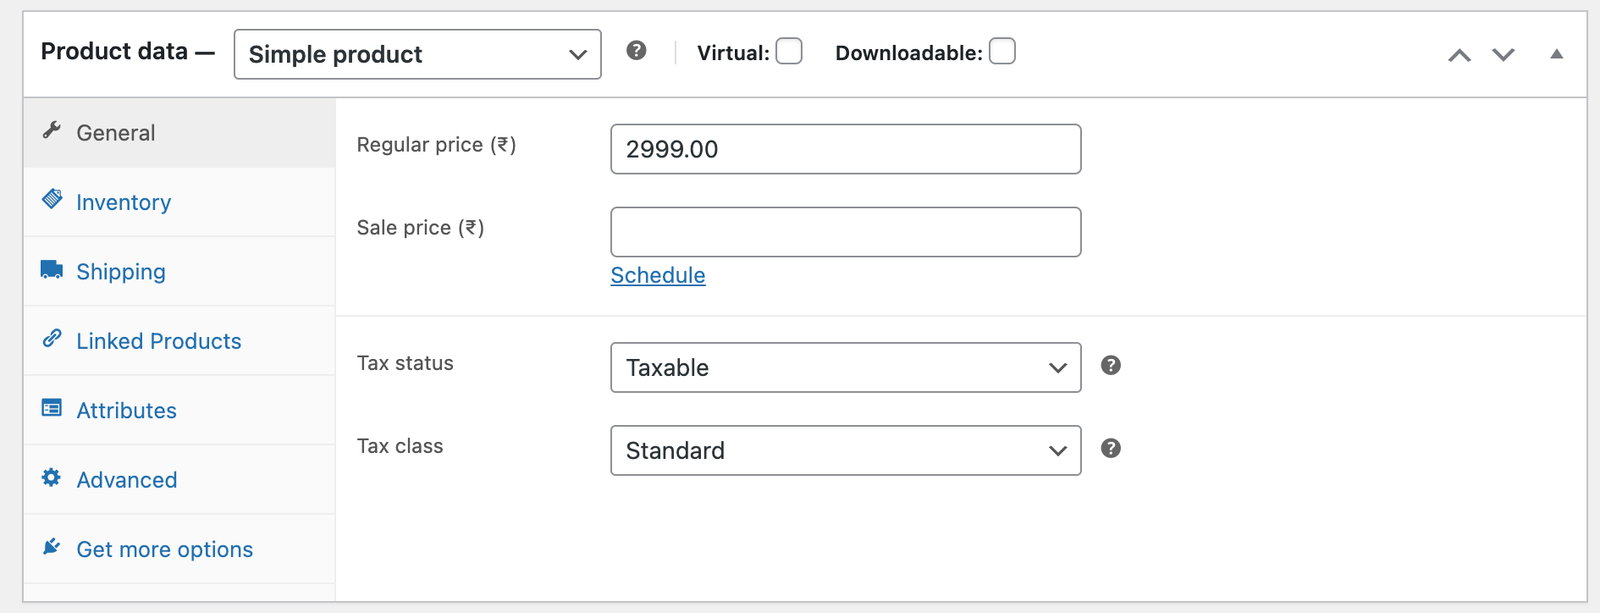
To implement taxation on your products change the tax status to Taxable and select the Standard tax class to implement GST on the selected product – under Product data which can be accessed while adding a new product or editing an existing one.
Step 5:
It is essential to include GST calculations in the invoices issued to clients and packing slips, this can be implemented by installing the following plugin: WooCommerce PDF Invoices & Packing Slips or other available plugins.
Step 6:
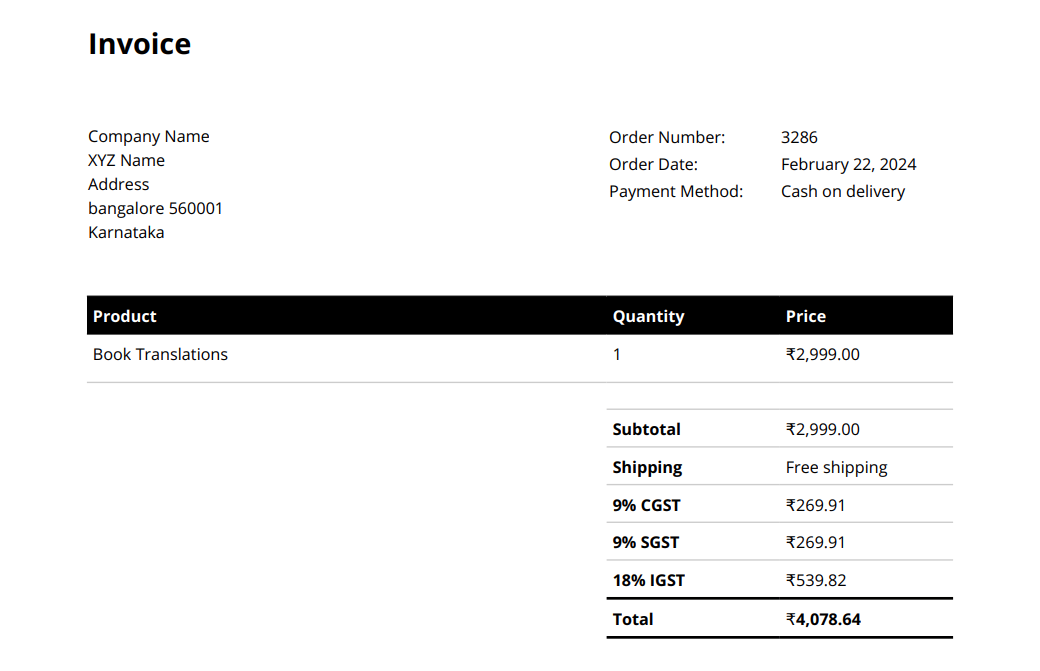
Once installed and activated, when an order is placed you can simply choose an option and download the file with GST calculations being implemented for you.
Simply go to WooCommerce ➞ Orders and select the order which you would like to download an invoice for and choose from the bulk actions dropdown menu.

Once the option has been applied the selected file will be ready to view as a PDF.
In conclusion, WooCommerce is a powerful tool for creating online stores smoothly through WordPress. Its user-friendly interface along with its extensive features for product management, order processing, payment options and implementing taxation on sales enables online sellers to set up, manage and run their stores with ease. WooCommerce empowers businesses to thrive in the online marketplace while offering a seamless and professional shopping experience for customers.
For any further assistance regarding WooCommerce, WordPress or other queries relating to setting up your online store, feel free to reach out to us at info@simplileap.com.

Fueled by a passion for constant learning, I’m diving into the worlds of technology and web development. Despite being new to these fields, I thrive on challenges and love learning and experimenting with various programming languages. Working at Simplileap, I eagerly seize every chance to grow under their guidance. With my determination and enthusiasm, I’m committed to excelling in my career and becoming a valuable asset in the tech industry.


Peol
February 29, 2024Valuable guide! Step-by-step instructions for setting up GST in WooCommerce with tax invoicing. Practical insights for seamless compliance. Much appreciated!