Customizing your Shopify product pages with metafields can significantly enhance the information you provide to customers and improve their shopping experience. Metafields allow you to add additional content to your products, such as specifications, special features, or any other custom information you want to showcase.
By using schema Liquid, you can make these fields editable in the Shopify theme file, which makes it really easy to update the content being displayed on the product page. This flexibility gives you the ability to easily modify the product page to focus on product design.
Here’s how to create a custom section on your Shopify product page using Metafields with schema liquid code.
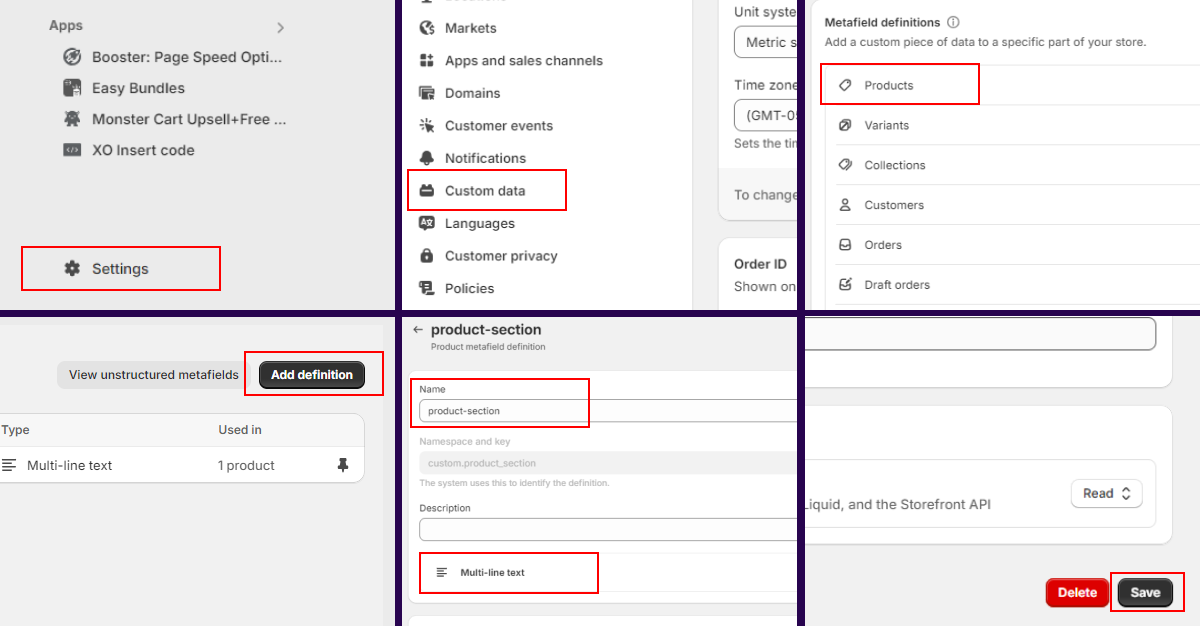
Step 1: Create a Metafield for products
Login to Shopify Admin panel – Navigate to Settings – click on Custom data – click on Products – click on Add definition
Fill all the fields given below.
Name: Add a custom title name in this field.
Namespace and Key: you can leave this field as it is.
Select type: select the Multi-line text and click on Save below.
Example: I gave a title name product-section
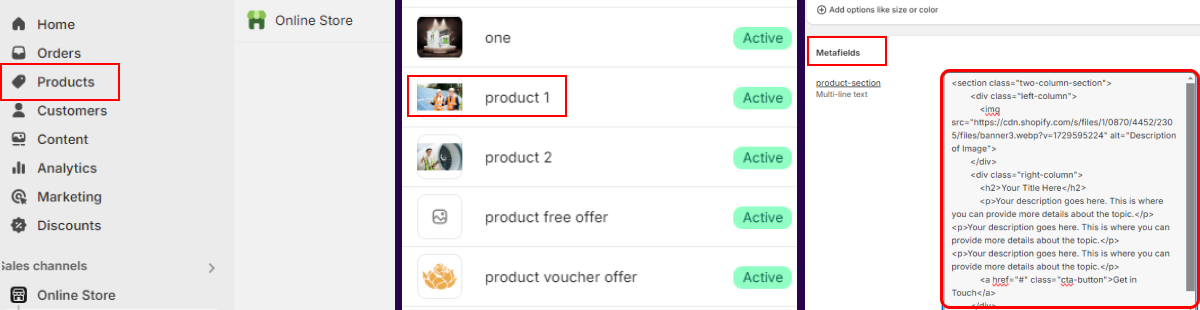
Step 2: Add Metafield Data to Products
Click on the Products in the admin panel – Select a Product you want to add the content – Scroll down to Product Metafields Section – add your content data or code in the metafield you created. and click on Save.
Example: Here i am adding a two column section html code. On the left column image will be displayed on the right column Title, description and button will be displayed.
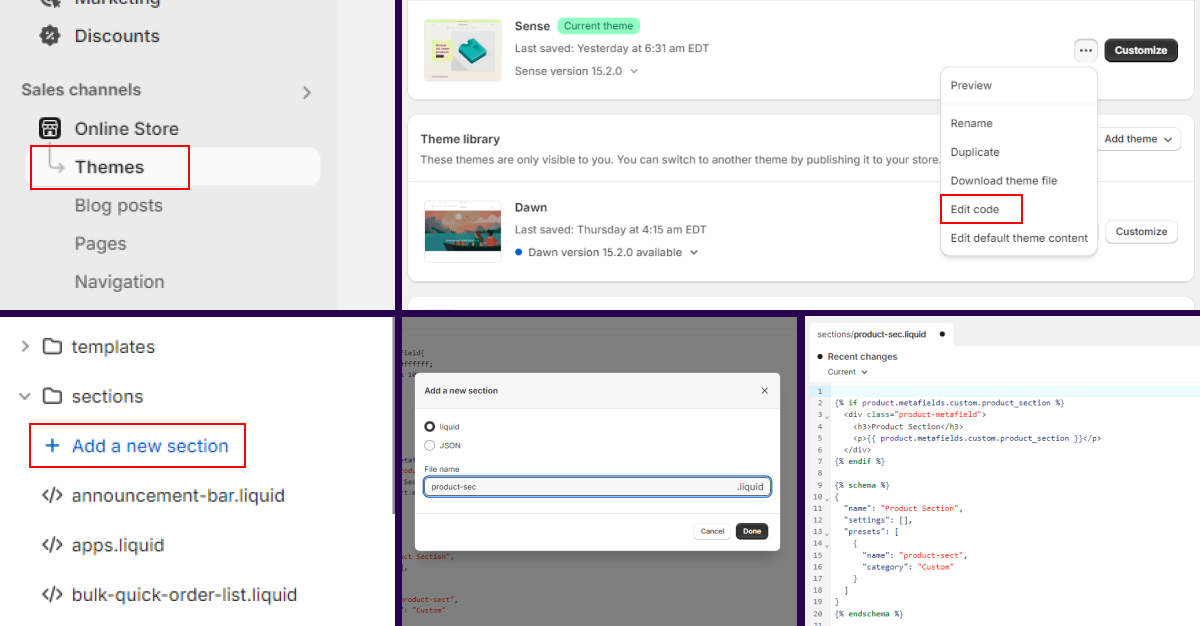
Step 3: Create a new section in theme file to display the Metafield
On your Shopify Admin panel – click on Online Store – click on Themes – click on the three dots before Customize button on the live theme and click on Edit code
On the left panel click on sections – click on +Add a new section – on the popup enter any name and click on Save. Note: it should be in liquid file format
Follow the below procedure and add the below code in the file.
—————————————————————–
{% if product.metafields.custom.product_section %}
<div class=”product-metafield”>
<h3>Product Section</h3>
<p>{{ product.metafields.custom.product_section }}</p> </div>
{% endif %}
{% schema %}
{ “name”: “Product Section”,
“settings”: [], “presets”: [ {
“name”: “product-sect”, “category”: “Custom” } ] }
{% endschema %}
——————————————————————
Note: Here we are linking the metafield that created for the product { product.metafields.custom.product_section }
Once updated click on Save
Step 4: Drag and drop the Metafield section in the product page
To display the Metafield section in the product page you can drag and drop in the Template field wherever you can. to achieve this follow the below procedure.
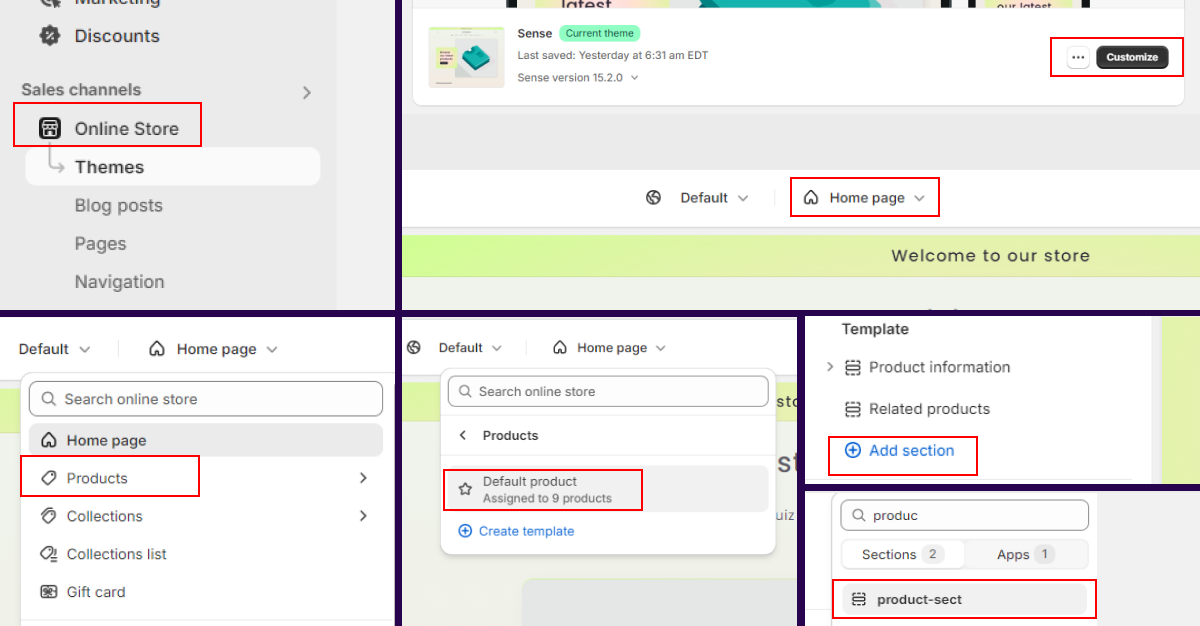
click on Online Store – click on Customize on your active theme – in the top navbar click on Home page – click on Products in the dropdown and select and click on the Default product
Note: Select the template if you’re using any other custom product template for your product page other than Default product template.
on the Default product – Navigate to Template field on the left side bar click on Add section – search the metafield section that you created and click on that and Save
Step 5: Publish and Preview
Click on Save and test your changes on the website, once the custom section has appeared on the product page. For other products you can add the custom content in related product metafields and check in the frontend of the website.
For any further queries regarding Metafields , feel free to reach out to us at info@simplileap.com.

I am a proficient Full Stack Designer and Developer with extensive experience in creating visually stunning and highly functional websites. My expertise spans across front-end design, as well as back-end development.


