
What is SMTP?
SMTP stands for Simple Mail Transfer Protocol. It is used for sending and receiving email messages between servers. It follows a client-server-model, sender’s email server communicated with the recipient’s email server using a series of commands and responses to transfer the email messages. Messages typically include information such as the sender’s and recipent’s email address, subject and actual content of the message.
How does SMTP work?
- The process starts when the user sends an email from their email client.
- Email client connects to the SMTP server.
- When the user sends the email, an SMTP connection is set up between the client and the server.
- The receiving server checks the email address of the sender and contents of the email for validity.
- The sending server transfers the email message content to the receiving server, which includes content of the message, subject, email address of the sender.
- When the receiving server has accepted the message it sends a confirmation message to the sending server.
- The email is delivered to the recipient’s mailbox where they can access it through their email client or webmail interface.
How to setup SMTP in WordPress:
Step1: Go to your WordPress Dashboard and Plugin > Add new plugin.
Step2: Search for WP Mail SMTP Plugin.
Step3: Install and Activate the Plugin.
Step4: After you install and activate a new menu will show up named WP Mail SMTP.
Step5: In WP Mail SMTP menu go to settings.
Step6: You will see several configurations options available.
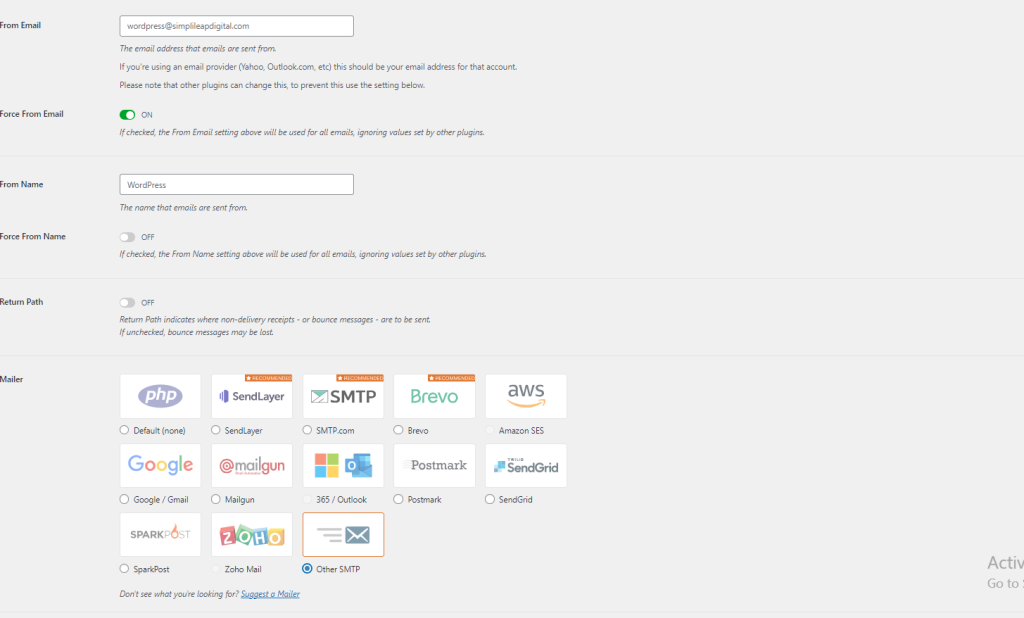
From Email – The email address you want to send emails from.
From Name – Name that your emails will be sent from.
Mailer – You can choose any mailer like Default PHP mail, Google/Gmail, Outlook, Zoho Mail etc. If you choose the Deafult PHP mail it will send messages using PHP mail() function without SMTP authentication. Gmail/Google, Mailgun and Sendgrid requires information about Client ID and Client Secret and API key, and in other SMTP server you should enter aditional configuration details.
Return Path – Check if you want to match the return path for your emails to the sending email.
Below I will explain how to use Google/Gmail and Other SMTP mailers.
Steps to setup and configure Other SMTP.
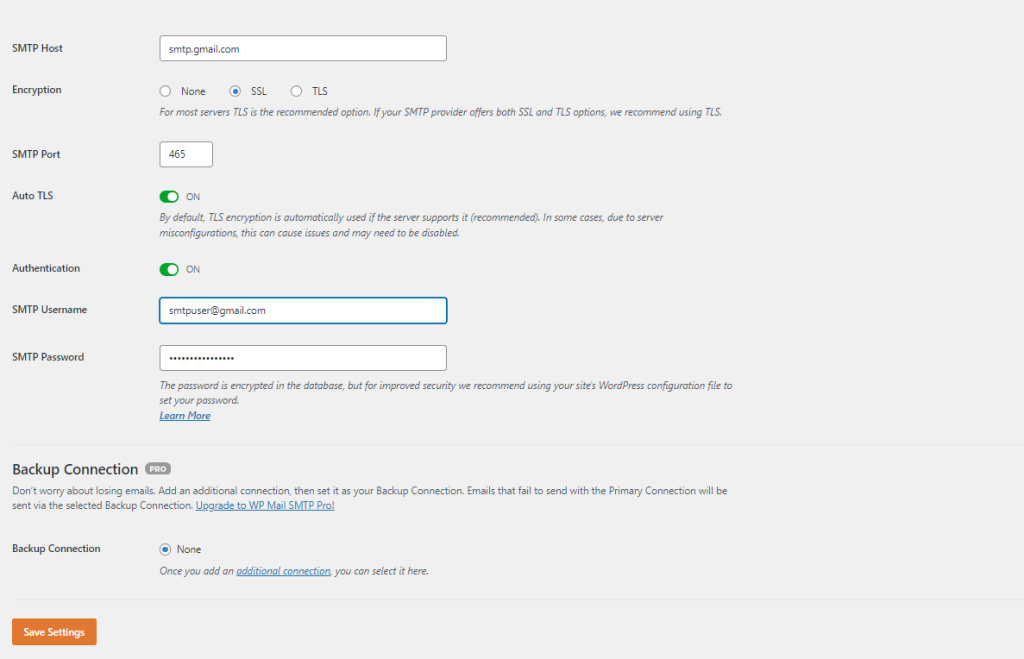
Step1: In Other SMTP you have SMTP host, Encryption, Port etc.
Step2: Fill all the necessary fields.
SMTP Host: The hostname for your SMTP server.
Encryption: Enable this option if you have SSL/TLS encryption available.
SMTP Port: Enter the port your server works on.
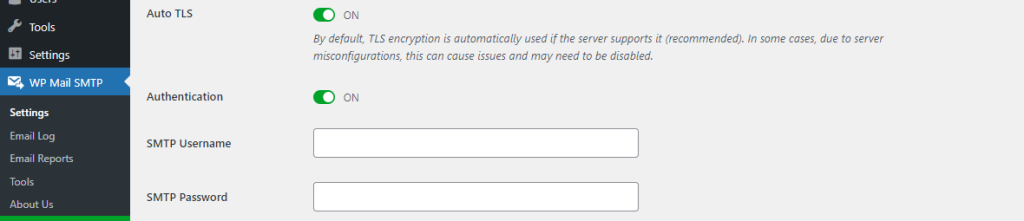
Auto TLS: TLS encryption is automatically used if the server supports it.
Authentication: If your SMTP server requires authentication enable it.
SMTP Username: Enter your email address.
SMTP Password: Enter the password that you have set for your email
SMTP Password: Enter the password that you have set for your email address in the Username field.
Step4: Once you have entered all the details, click on save settings.
Step5: After you save it send a Email test, in WP Mail SMTP menu go to Tools > Email Test.
Step6: Send a Test Email to check if you’re receiving messages.

Steps to setup and configure Google/Gmail.
In Google/Gmail you require a Client ID, Client Secret and Authorized redirect URL. To create these go to the Google Cloud Console Dashboard.
Step1: In Google Cloud Console Dashboard. Click on New Project, add Project name and Location and click on Create.

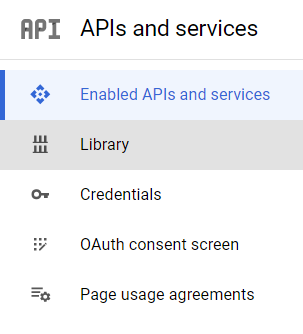
Step2: Go to APIs and Services >> Library. Search for Gmail API.
Step3: Click Enable, and you will be directed to a new page that says Create Credentials.

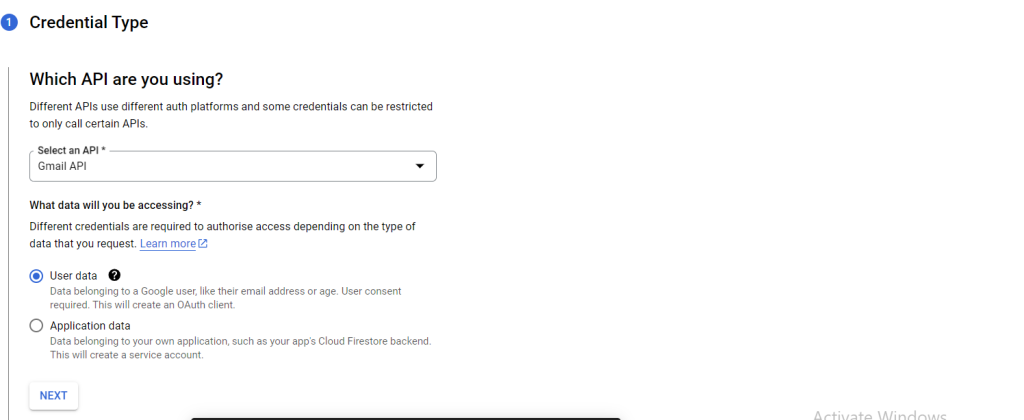
Step4: After you click on Create Credentials, select Gmail API from the Dropdown, and enable User Data, and click on Next.
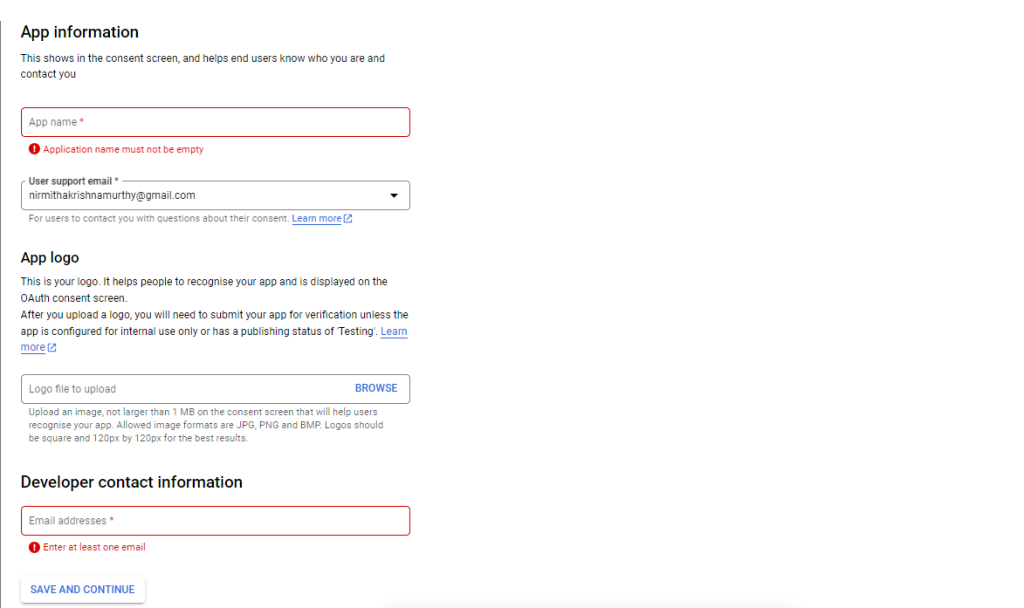
Step5: Enter the App Name, user support email address, logo(optional) and developer contact information, and click on save and continue.
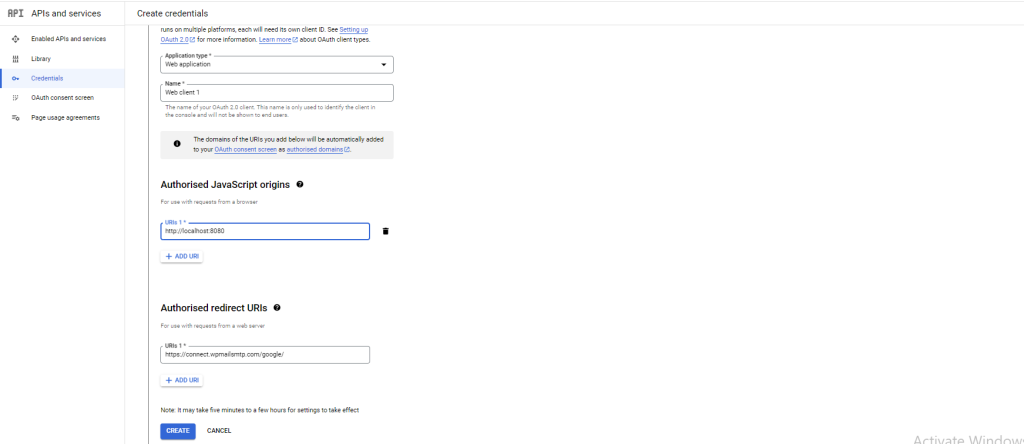
Step6: In Oath Client ID select web application as application type, which will make a new name field appear, keep the default name and in Authorised JavaScript origins add your URIs it can be your websites URL and in redirect URIs add https://connect.wpmailsmtp.com/google/ (you can find this URI in Google/Gmail mailer), and click create.

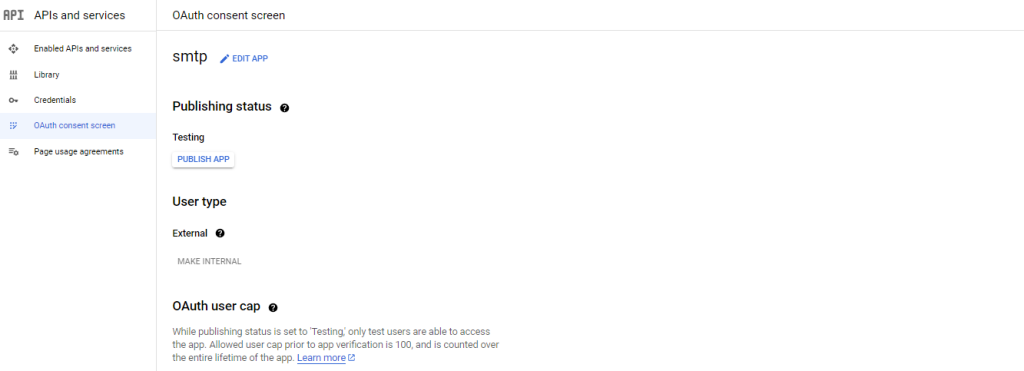
Step7: In your Google Cloud Console sidebar, go to APIS & Service > OAuth consent screen under user type click on External button.
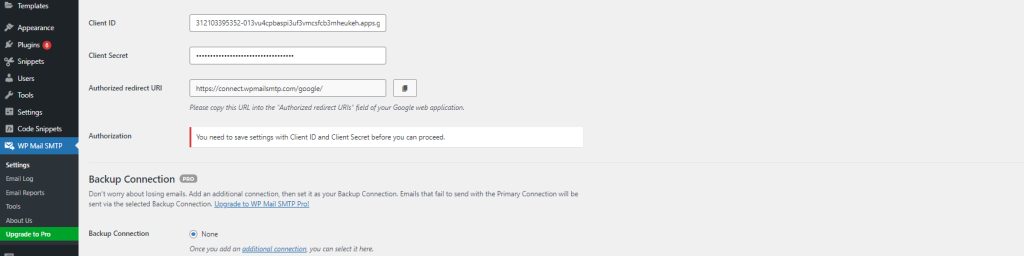
Step8: Click on Credentials on the left-side menu. Under OAuth 2.0 Client IDs you can see the details of the web application that you have created, and to view Client ID and Client Secret click on pencil icon and it will be on the right side.

Step9: Copy the values of Client ID and Client Secret and paste them in your WP Mail SMTP plugin. Click Save Settings.
Step10: Click on the orange Allow plugin to send emails using your Google account button. This will ask you to sign in to your Google account and allow wpmailsmtp.com to access your Gmail email. Click Allow to proceed.

Step11: If you have done all of the above steps correctly you will be returned to the WordPress WPMail SMTP plugin’s Settings page and a notice saying “You have successfully linked the current site with your Google API project. Now you can start sending emails through Gmail.” will be present.

Driven by a relentless desire to learn and grow, I find myself exploring the domains of technology and web development. With boundless passion I am dedicated to progressing in my career and making significant contributions to the tech sector.


https://gamebaidoithuongok.com/
March 28, 2024Great delivery. Solid arguments. Keep up the great effort.